

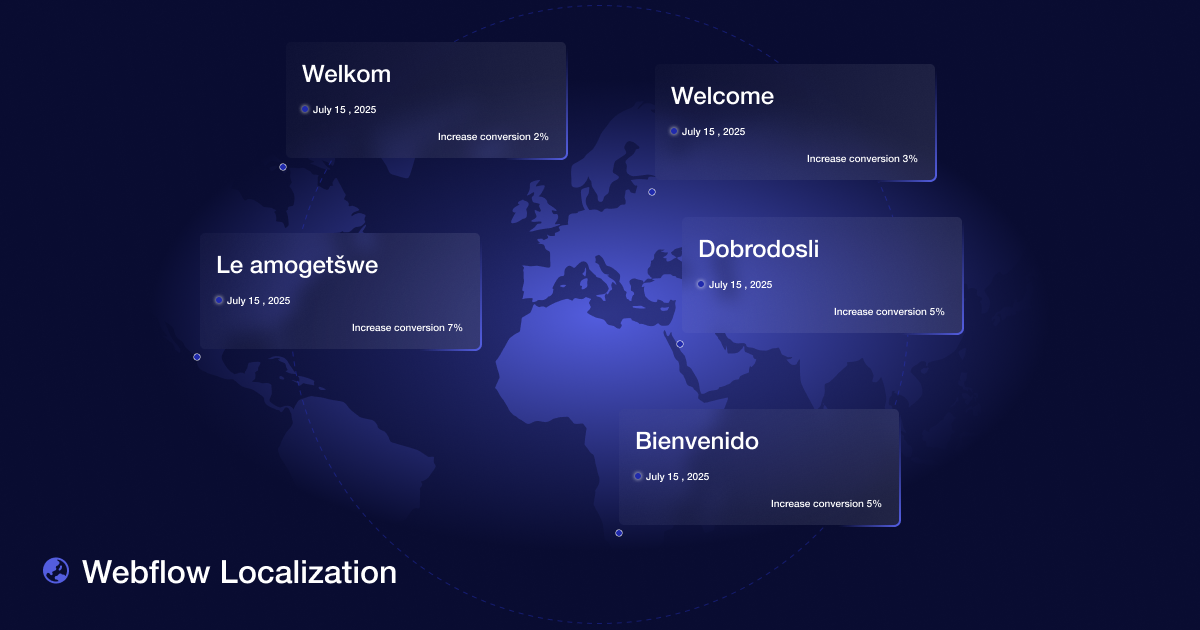
If you want to reach a wider audience and connect with your visitors on a deeper level, Webflow Localization is one of the best things you can do. Visitors respond much better when they see content in their own language — the website instantly becomes more appealing, accessible, and immediately builds greater trust. In addition, localized content means better SEO results in different markets, because users can more easily find exactly what they need in a language they understand.
In this post, I will explain Webflow Localization in detail — from translating static content to adapting the design, localizing the CMS, and creating a language switcher.
What is Webflow Localization?
Localization is not just about translating your website into your audience’s language — it’s about adapting your site to their culture, understanding their preferences, and showing them that you care enough to speak their language, both literally and figuratively.
Localized websites create a stronger sense of personalization, trust, and relevance, and make it more likely that users will engage with you. Research has shown that over 70% of people are more likely to buy your product or service if the information is in their own language.
Let’s take Airbnb as an example — they tailor their listings and information based on the region. The Spanish Airbnb site offers deals specifically for Spanish travelers, using their language, with listings relevant to popular destinations in Spain and a tone that resonates with local habits. This approach not only provides a better experience for users but also boosts conversions by making information more accessible.
Localization vs Translate
Before you start the process, it’s important to understand the difference between localization and translation. Although at first glance they might seem the same, there is actually a clear difference
- Translation is simply converting words from one language to another.
- Localization is where the real magic happens. It’s not just about translating text — it’s about culture, context, and user experience. You need to adapt the entire website for your target audience: cultural references, jokes, date formats (since dates are displayed differently in different countries), and even the color palette should be adjusted to suit your audience.
Think of localization as creating a unique experience for each audience. For example, if you have an online store with various products, you can categorize and display certain items only in countries where you know they’ll sell well — and hide those same products in other countries where you know they won’t perform as well.
Is Webflow best choice for Localization?
During my years of working with clients, I’ve tried various tools for multilingual websites, like Weglot and similar solutions, but Webflow has given me the best results — and here’s why:
- High SEO ranking – Optimizing for keywords and phrases specific to the region. Improved visibility in local search results.
- Global styling — Webflow allows you to set global classes for fonts, colors, and layouts, enabling your site to remain consistent across all languages without exceptions.
- Contact Form — Webflow’s multilingual forms let you style both the form and the confirmation message in every language, creating a seamless experience for users.
Still not sure if Webflow is the right choice for you?
Take a look at my previous blog where I explained 5 clear reasons why switching to Webflow is a smart move—especially if you’re already facing some of these issues.
How to Enable Webflow Localization: 5 Simple Steps
Step 1: Access Webflow Localization and configure the primary language
- When we enter the project on the left side we’ll have a configuration button
- Access Localization tab
- Add your primary Language
- Then add other languages you plan to translate your site
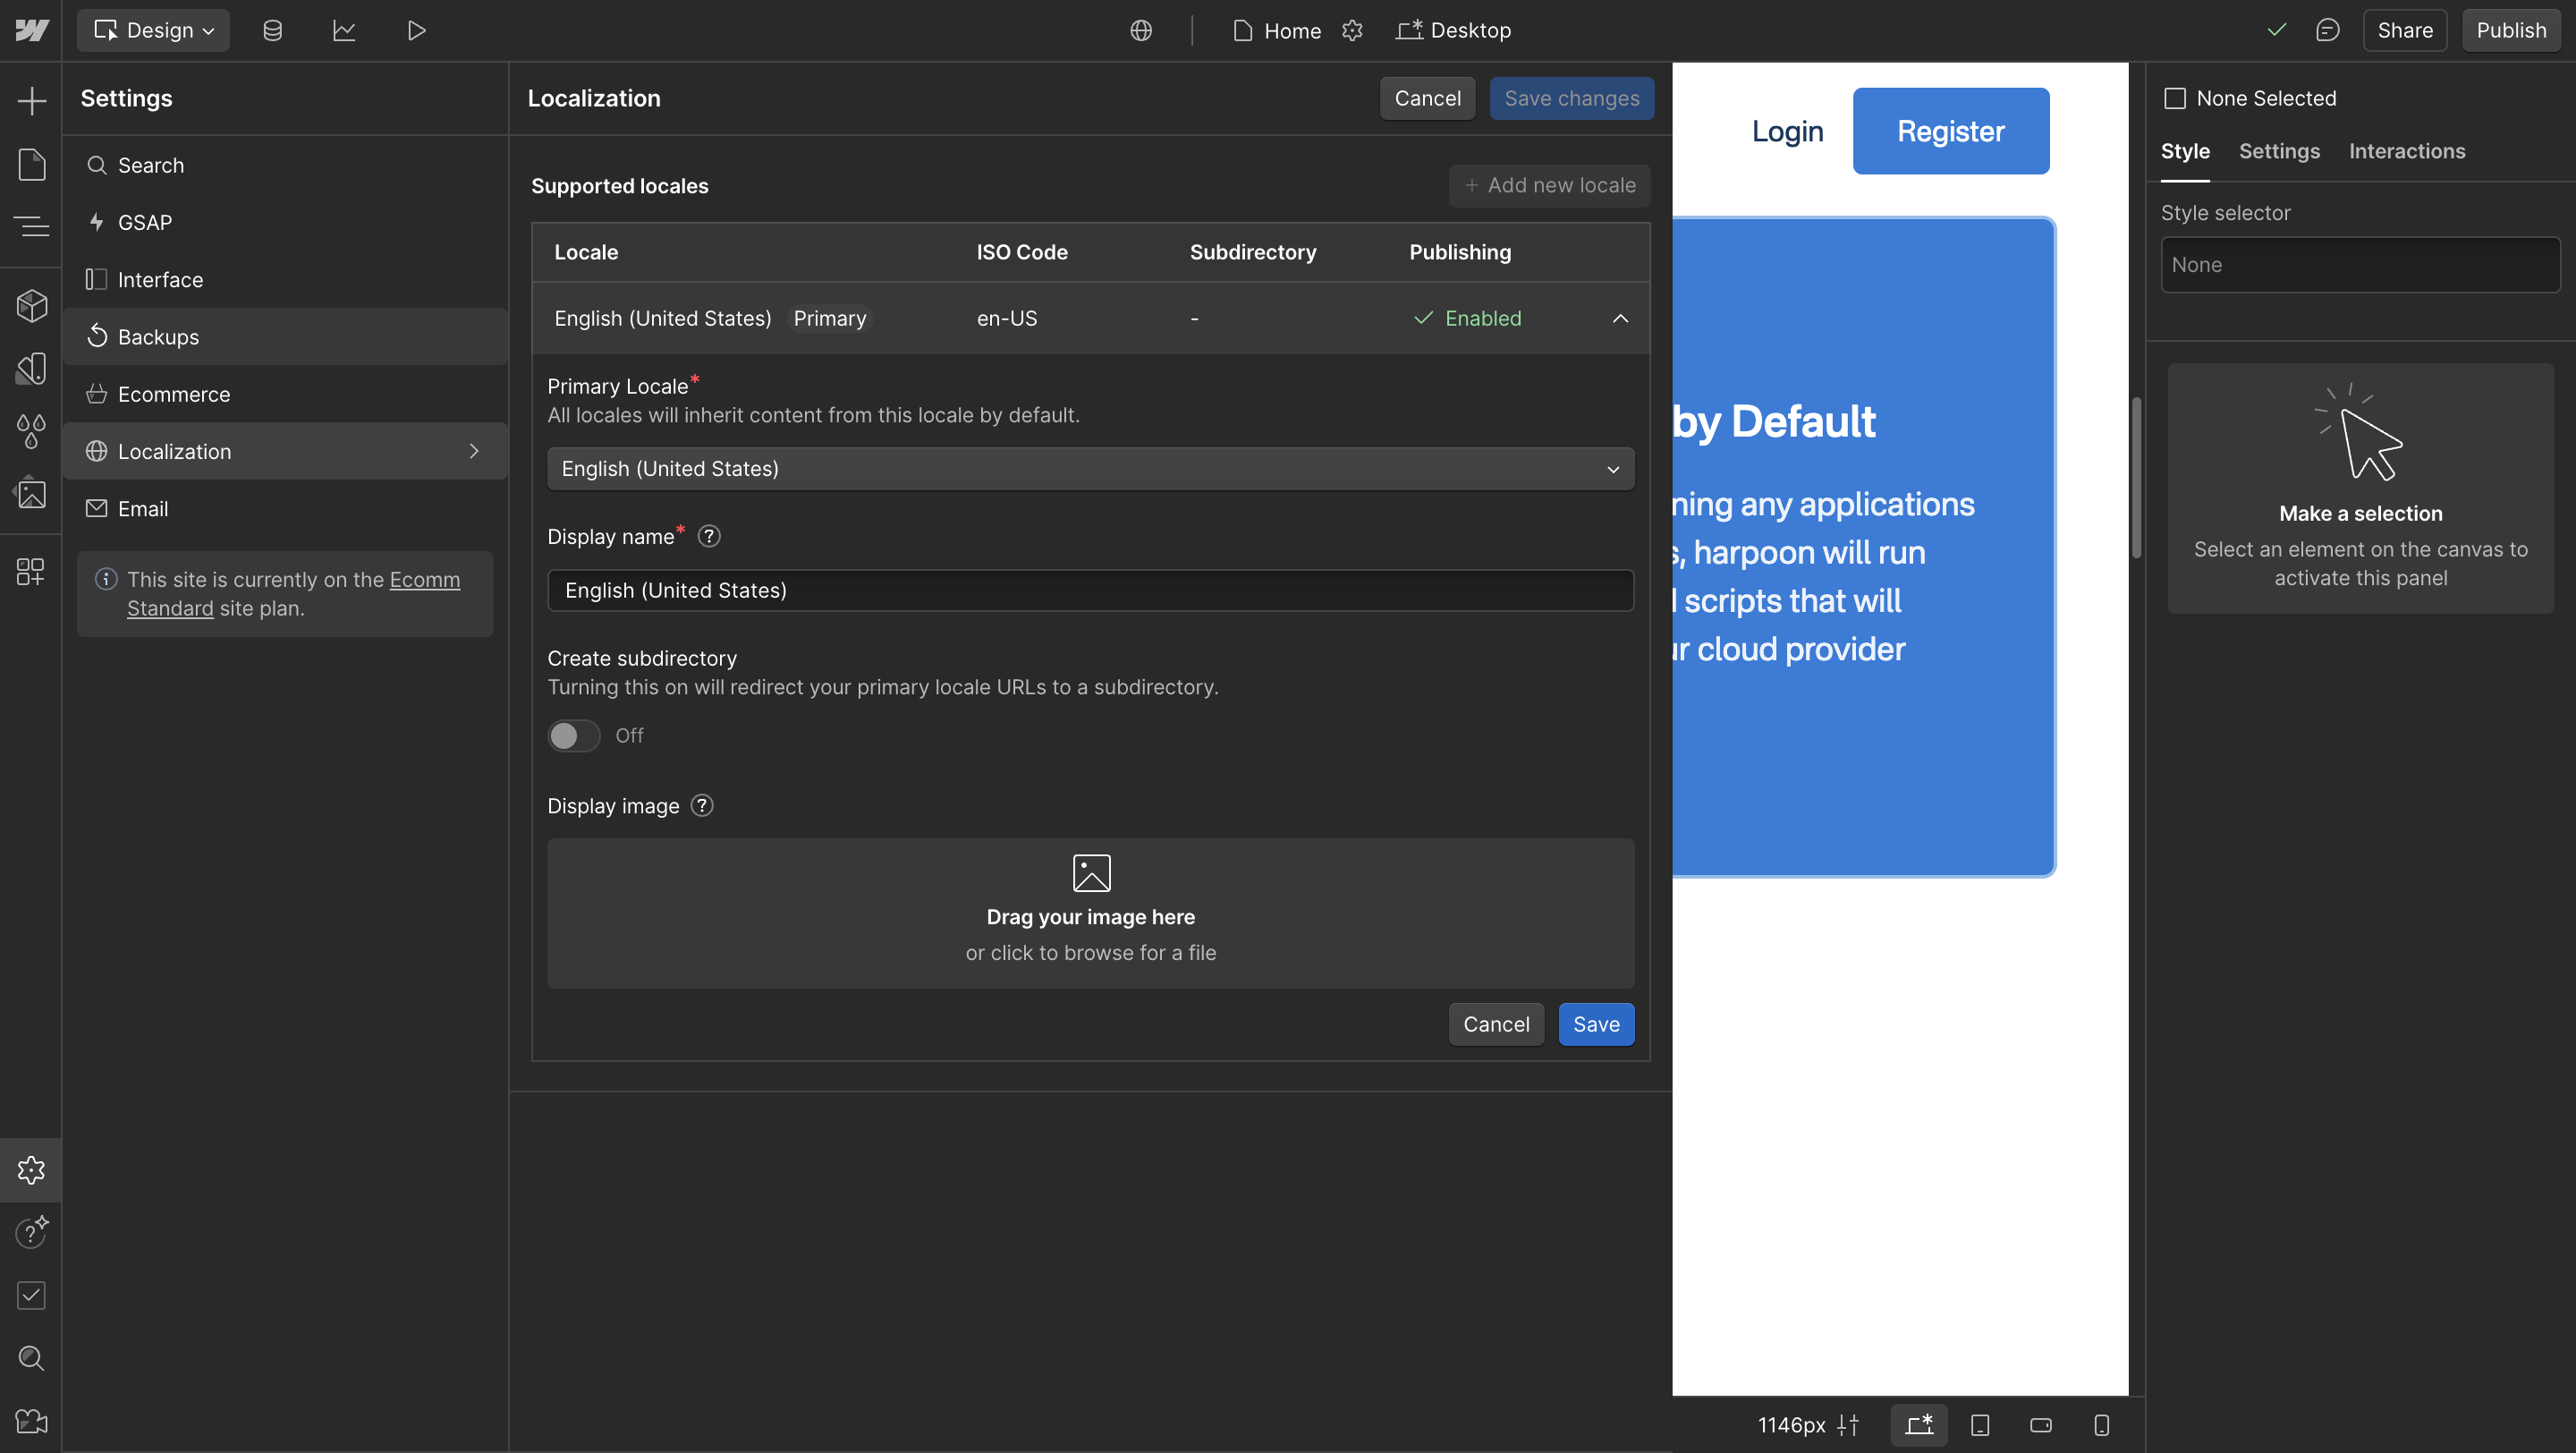
Configure next:
- Display Name: The name of the language that will be shown in the language selector
- Subdirectory for this locale: This is the URL path shown on every page of that language (for example, for Spain it would be /es)
- Enable publishing for the subdirectory: This option determines whether the version will be published at the next site publishing, allowing you to take the time to fully localize each new version without risking it being published before it's finalized.
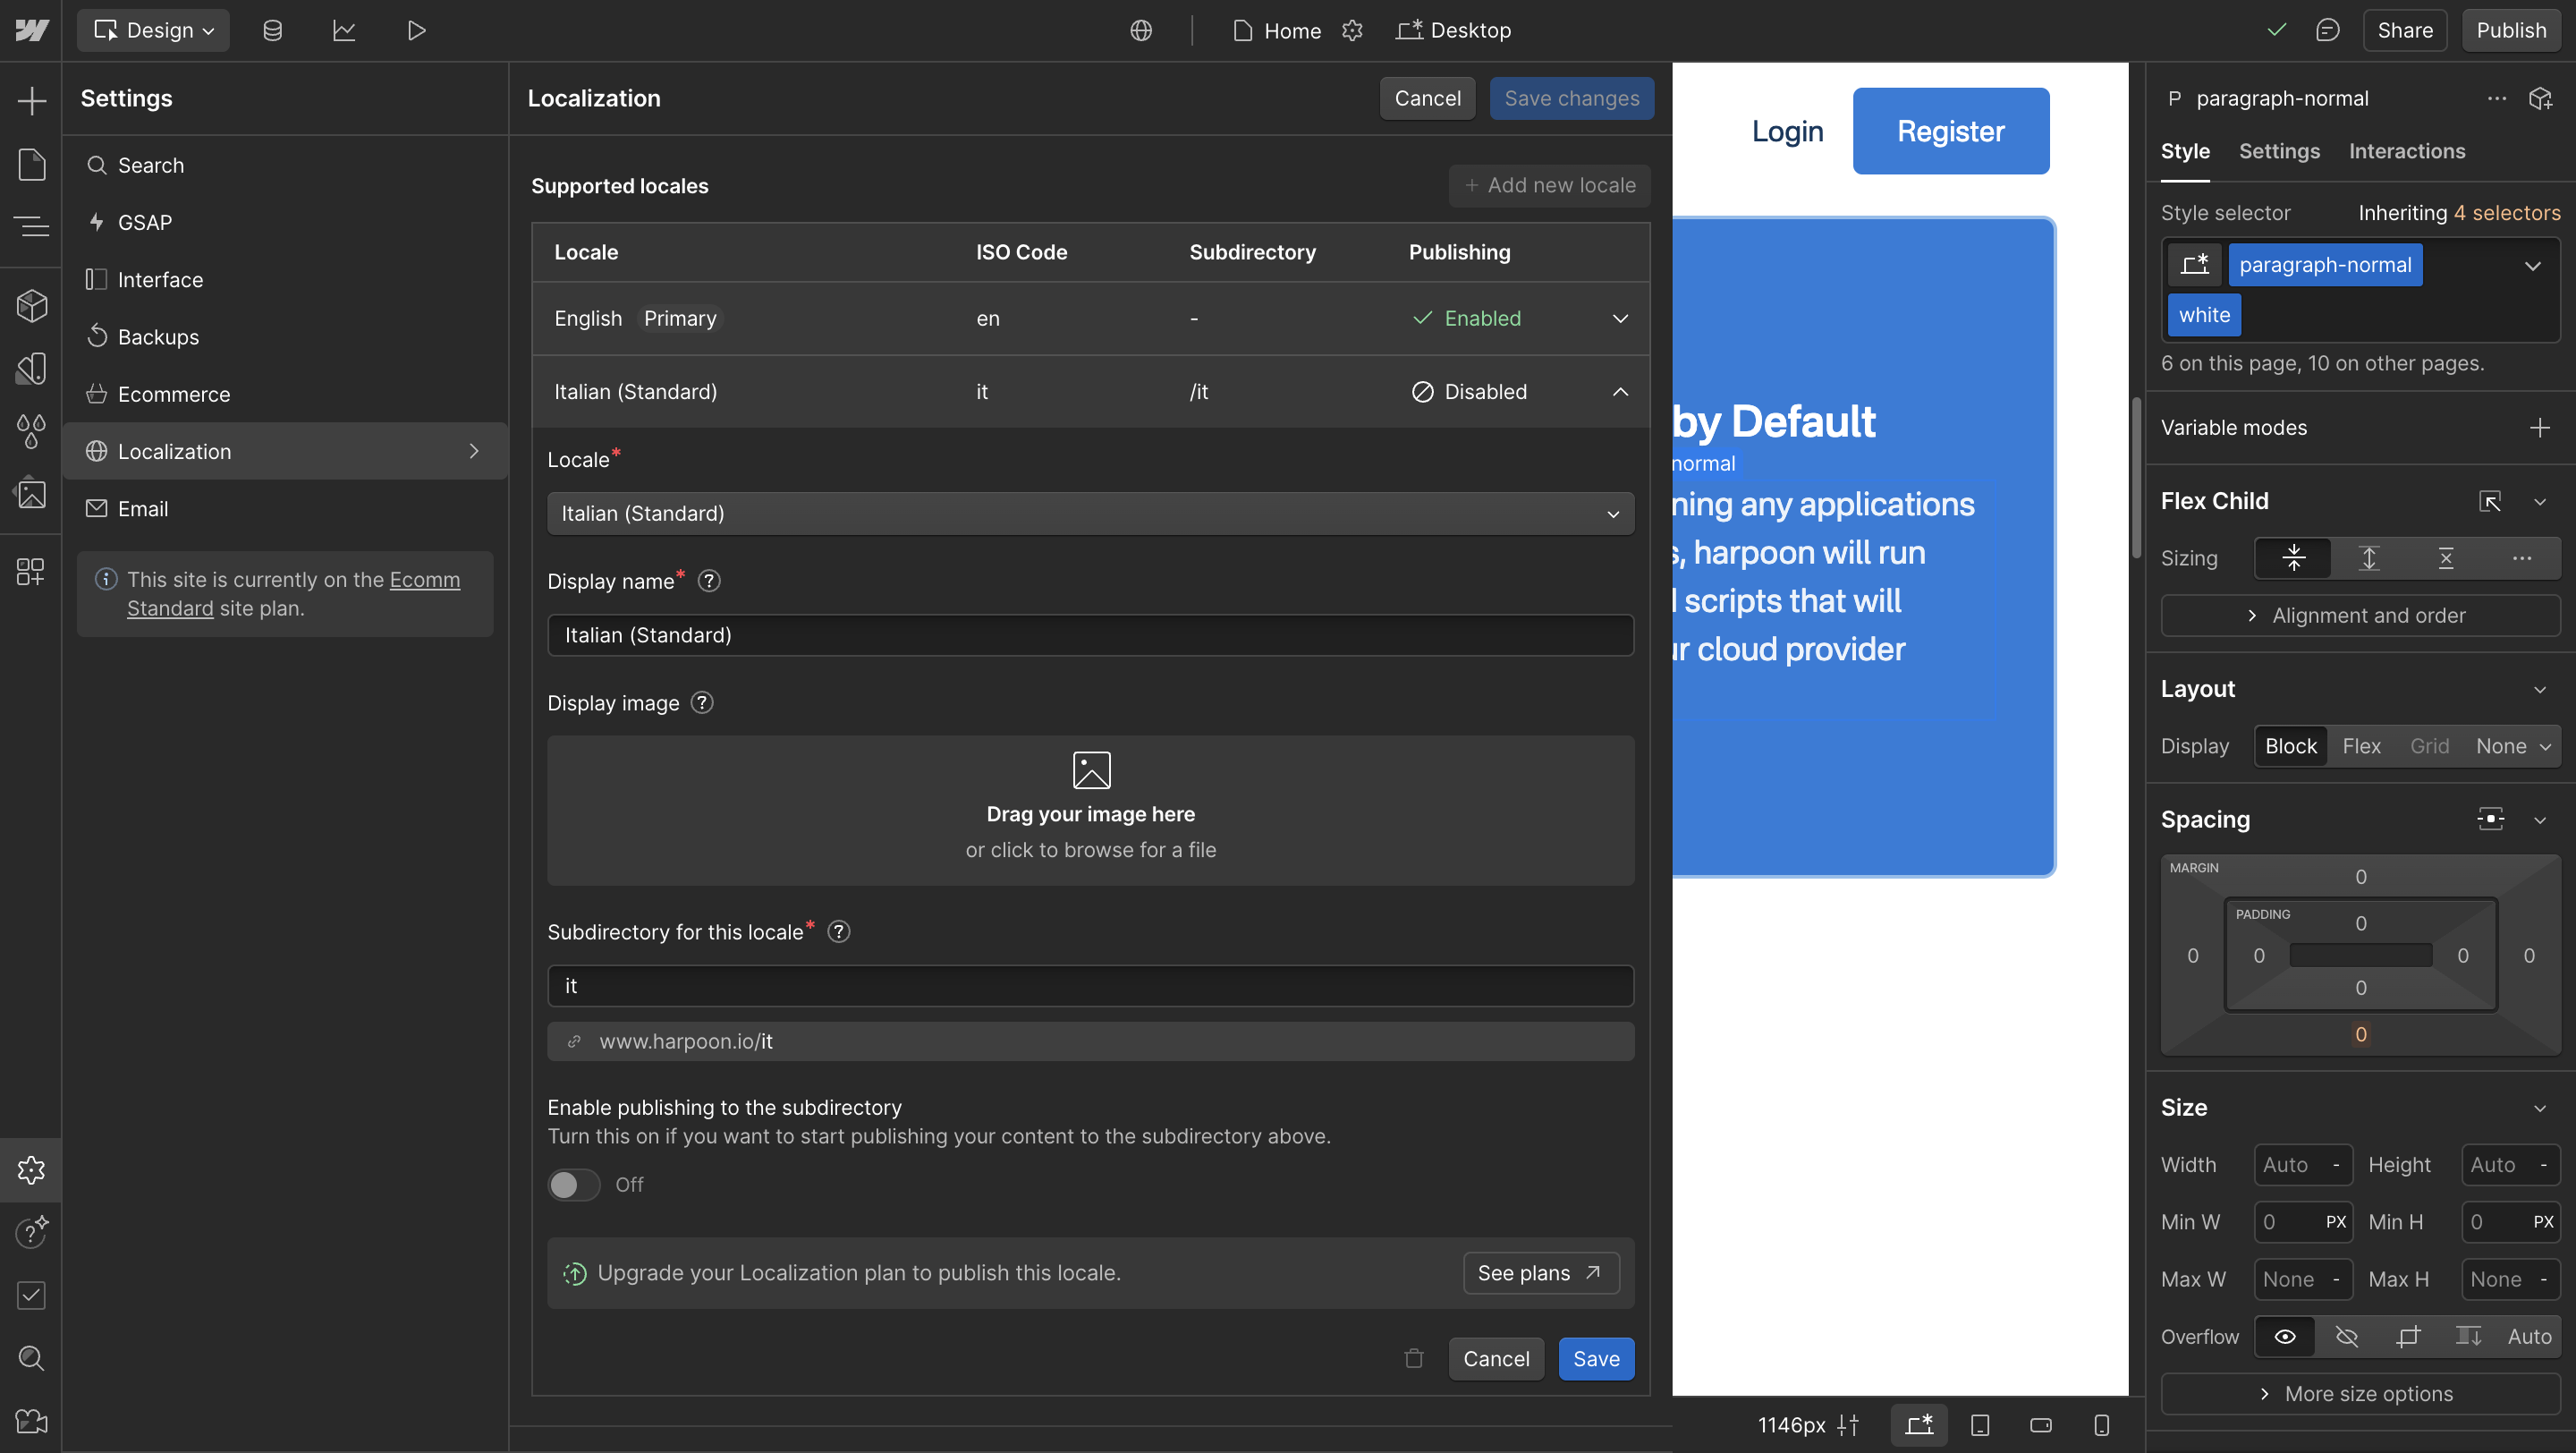
Step2 : Add new language
- Click on “Add new locale”
- Choose the language you need from the dropdown
- Configure it just like the primary language ( As I explained in the previous step )
Congratulations! You’ve successfully enabled localization on your Webflow site. The next step is to localize each version of your site by adding translations and other content tailored to that version.
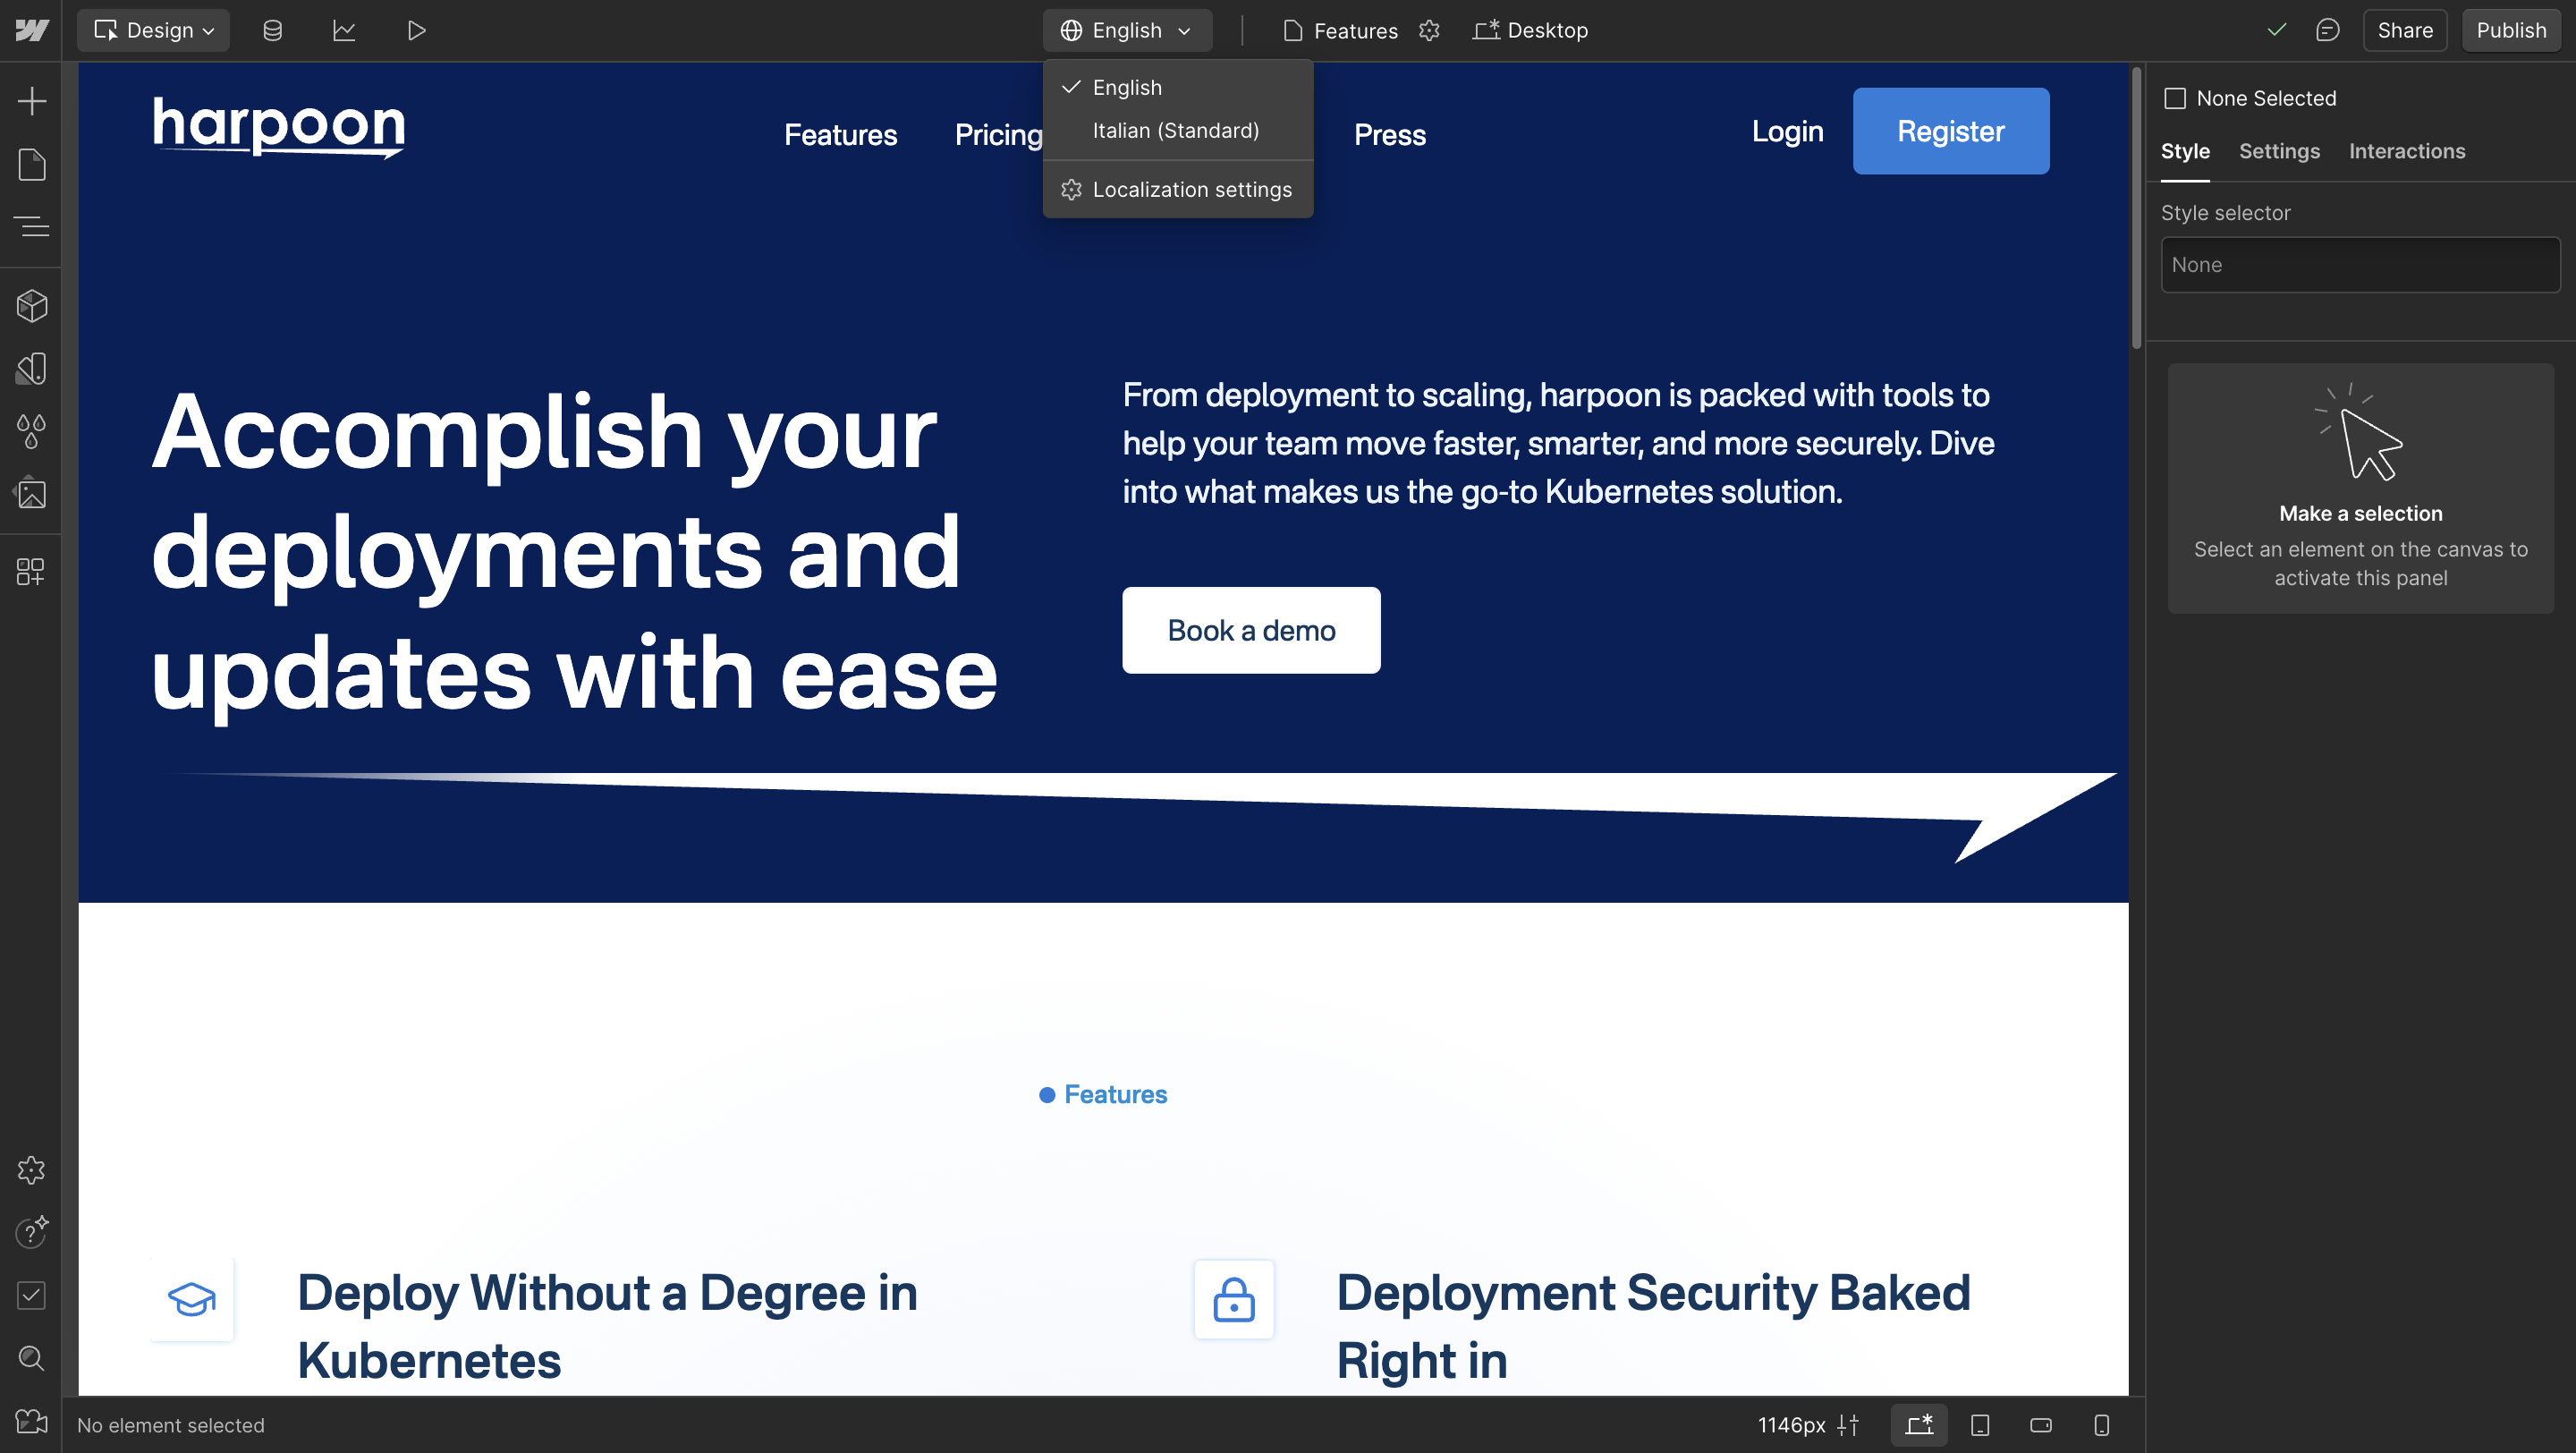
Step 3: How to translate content into the selected language
To get started, first select the language you want to make changes in.
Click the button in the top left corner ( Your primary language will be selected by default, but you will also find the other languages you have added there. )
There are two ways to translate text:
- Manually translating each piece of text
- Automatically translating an entire page (or section)
Manual translation – We simply select the text we want to translate and write the desired translation.
Automatic translation – Select the “Body” element in the main navigator, then right-click and choose the option “Translate to English,” which will translate the entire page into English.
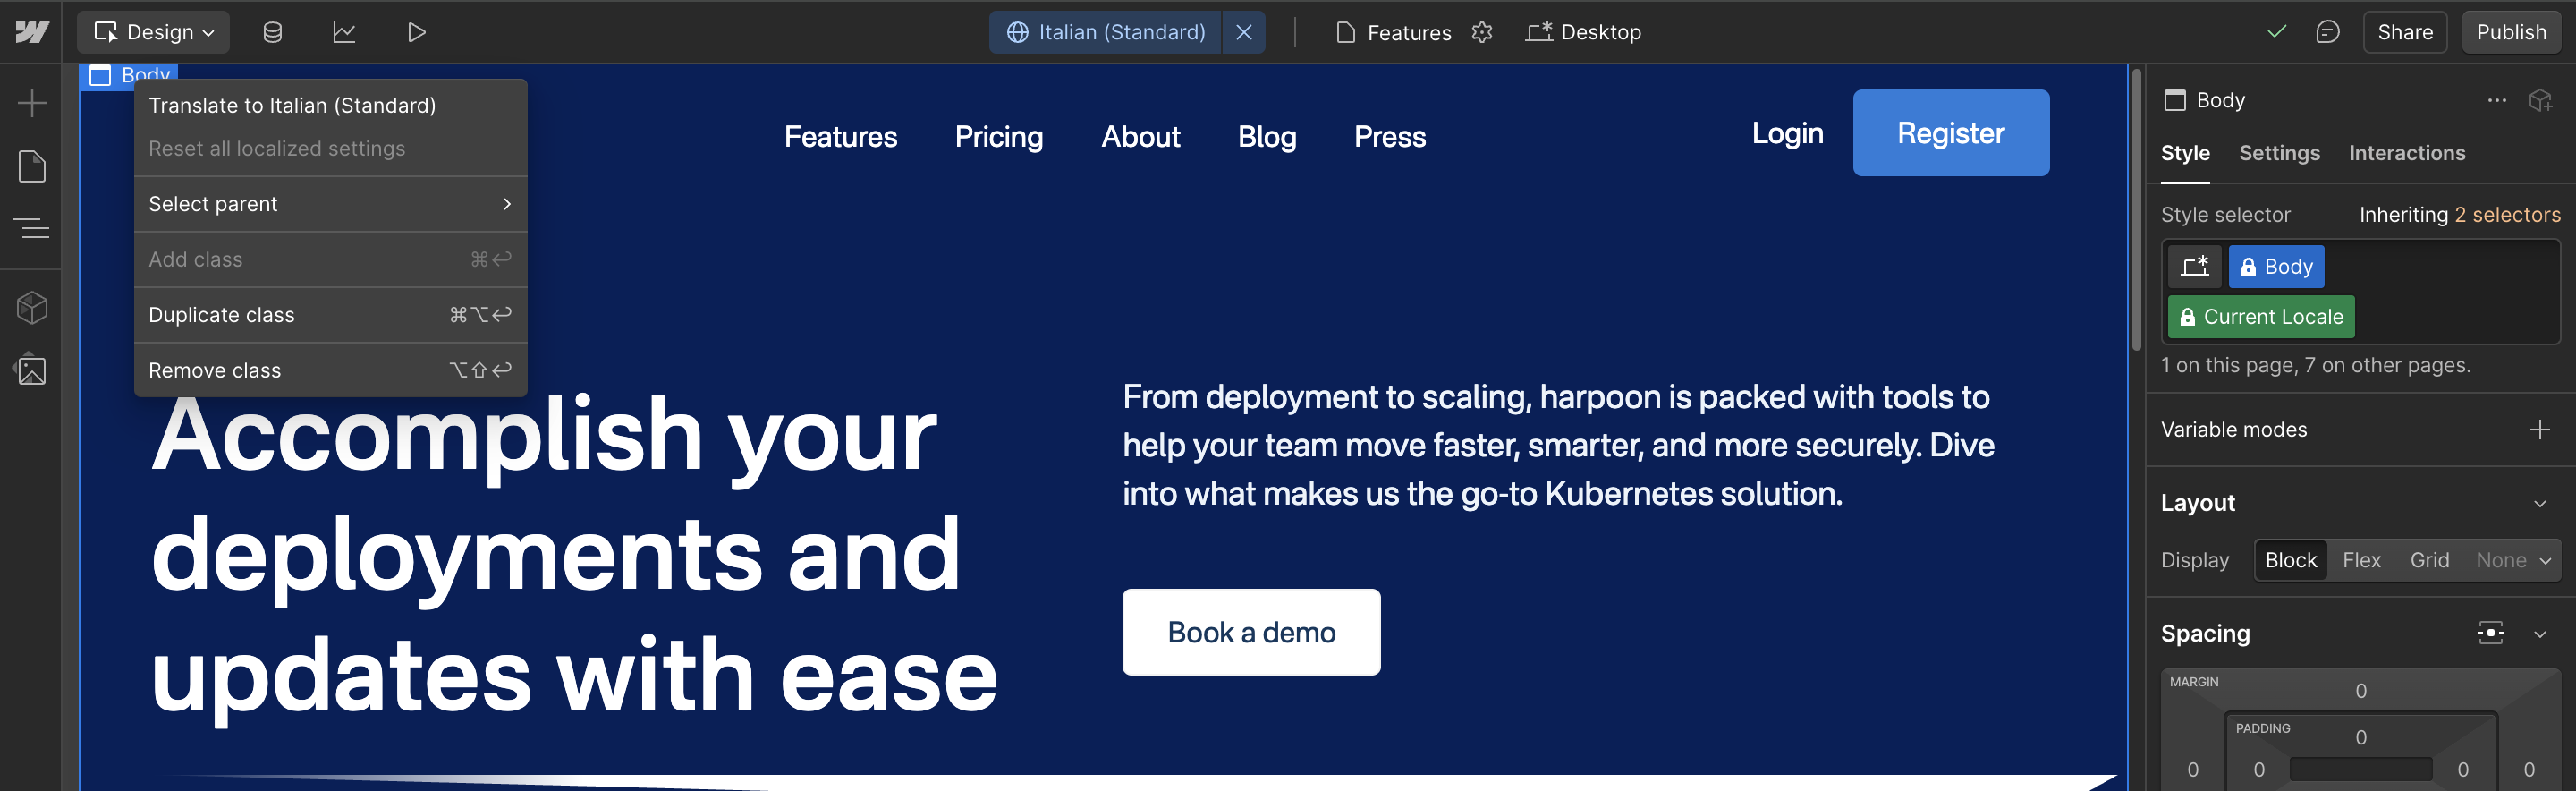
And just like that, we’ve easily translated our entire page into the selected language, and we can make edits to the translation if needed.
Step 4: Change an image or hide an element depending on the language ( Optional )
When it comes to localizing a website, every detail matters — whether it’s changing an image or hiding certain elements that could be significant. The good news is that with localization, you can customize these things depending on the language.
Change an image depending on the language
Imagine you have an image containing text, but in another language the text is different, so the image should reflect that text. Here’s how you can change the image accordingly:
- Make sure you are on the language version of the page where you want to make the changes.
- Select the image.
- Replace the image with the new one you planned for that section. You can also update the alt text to better describe the image and help search engines. ( The process is the same as when you replace any image in Webflow. )
Hide or show an element depending on the language
Imagine you have a website with a lot of content, but some elements are only relevant to a specific language. Instead of showing that content to everyone who doesn’t need it, a simpler way is to just hide those elements and create a better experience.
- Make sure you are on the language version of the page where you want to make the changes.
- Select the element you want to hide (it can be a section, button, image, etc.).
- Open the settings panel in the top right corner.
- Choose visibility: Visible or Hidden.
Step 5: Customize SEO options for better optimization
It’s also a good practice to translate SEO options into the selected language, such as the Meta Title and Meta Description, and to change the Open Graph image if needed. This is very important to translate these elements so users can find us in their own language.
- Make sure you are on the language version of the page where you want to make the changes.
- Access the page settings by clicking on “Pages” in the left menu and select the page where you want to add the translation.
- Next to each text field (Title Tag, Meta Description), there will be a “Translate” option — when clicked, it will automatically translate into the desired language, but you can also manually enter the translation.
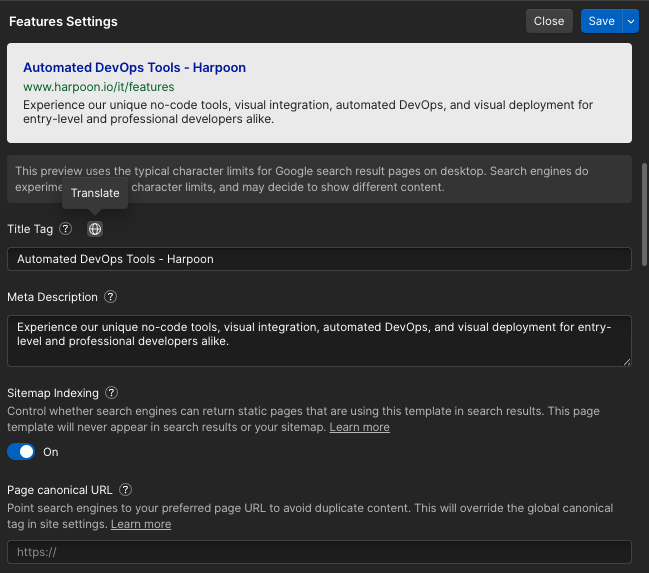
The process is also very simple for CMS Collections you just need to go into the collections you want to translate and click the “Translate to…” button.
Bonus Tip: Add a language list directly into the Navigation
To seamlessly switch between languages, creating a language selector is essential for every multilingual site. With Webflow Localization, you can now achieve this using a new element — the Locales List.
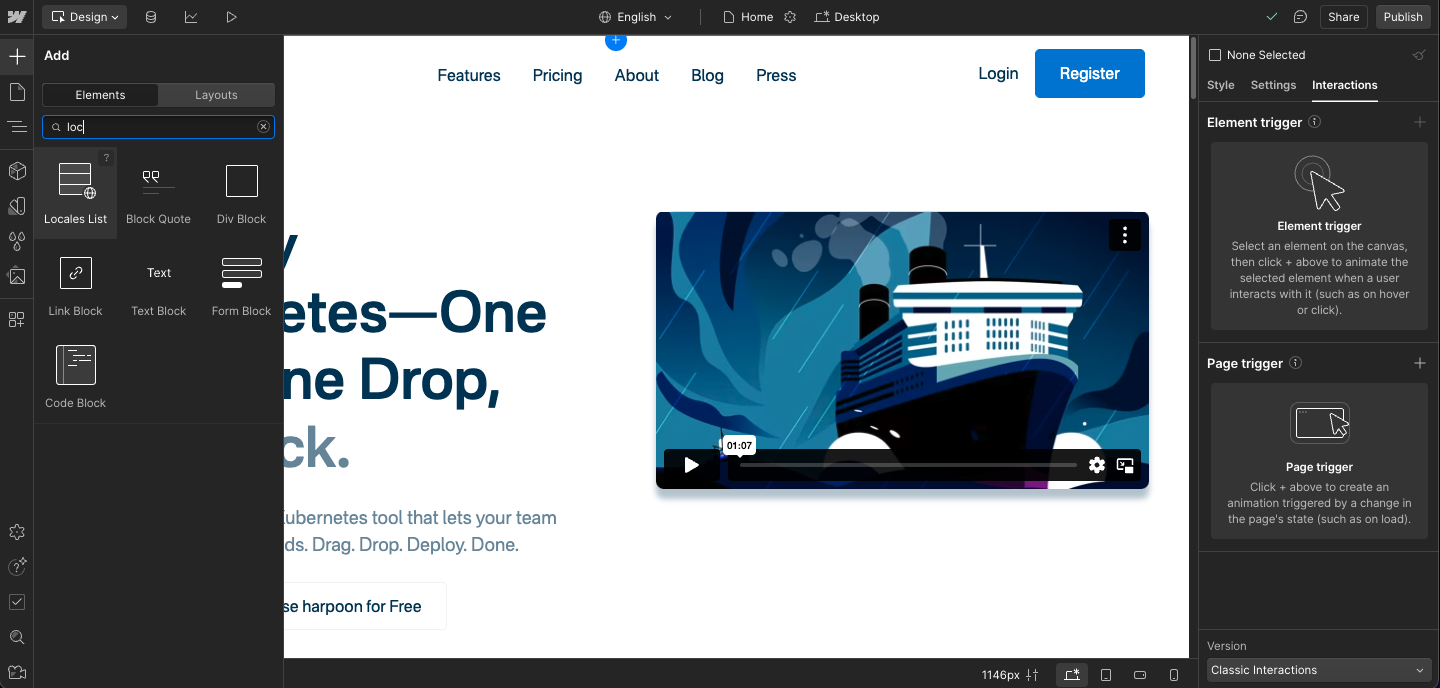
Benefits of Locales List:
- Easy installation: Simply add it to your site (in the navigation or anywhere, but make sure it’s clearly visible to users).
- Flexible customization: It’s very easy to create, and you can make various animation variations as you wish.
- Dynamic linking: The element connects to your localization settings and automatically displays all the active site languages.
Conclusion
Localization is important for businesses that want to expand internationally. Webflow makes localization easier through a few simple steps that we covered in detail in this post.
Also, it’s not only important to translate your site, but to align it with your target audience.
Remember, understanding your audience and giving them what they truly want is crucial.
If you need help implementing successful localization, contact me so we can broaden your horizons and business opportunities.
Have a brief? Let’s chat
Let's chat about your project, your needs, our expertise, our portfolio, and how we can join forces to create something cool!